Samosa Recipe Along with 5 Special Chutney
Welcome to Recipe Rahasya, where today we embark on a delightful culinary adventure with one of India’s most beloved snacks: the Samosa! This iconic triangular pastry, known for its golden, crispy exterior and savory filling, is more than just a treat—it’s a celebration of flavors, textures, and traditions that have transcended borders. Whether enjoyed as a street food staple, a festive appetizer, or a comforting evening snack, samosa hold a special place in the hearts of many.
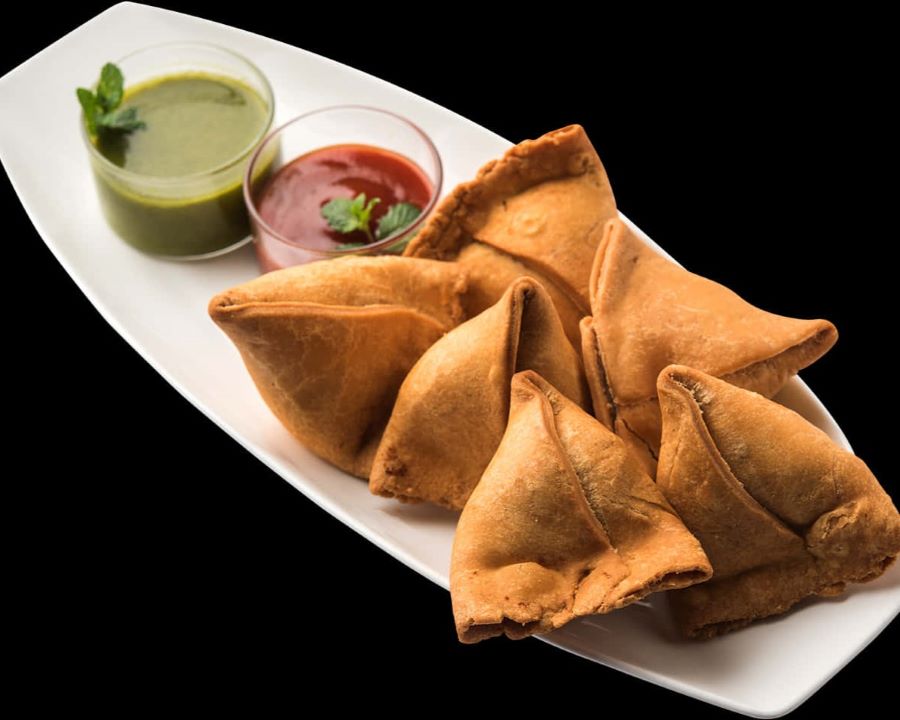
Imagine biting into a perfectly fried samosa, the crust crackling delightfully as you break through to discover a warm, spiced filling of potatoes, peas, and aromatic herbs. The combination of spices used to season the filling is what truly makes each bite an explosion of flavor. From cumin and coriander to the subtle heat of green chilies, every ingredient plays a role in creating that unforgettable taste.
Detailed Recipes of Samosa
In this post, we’ll guide you step-by-step through the process of making samosas from scratch, ensuring you achieve that ideal crunch and mouthwatering filling. Whether you’re a seasoned cook or a beginner in the kitchen, our recipe will empower you to impress your family and friends with this delicious Indian snack. Plus, we’ll share tips on how to customize your filling and serve your samosas with chutneys.
You can also watch video for more information – click here.
So, gather your ingredients, roll up your sleeves, and get ready to indulge in the rich culinary heritage of India right from your kitchen. Let’s make some samosas that are sure to be a hit at your next gathering!

Samosa
Ingredients
For the dough
- 2 cups all-purpose flour (maida)
- 4 tablespoon oil or ghee
- ½ teaspoon salt
- Water (as required)
For the filling
- 4 potatoes (boiled, peeled, and mashed)
- ½ cup green peas (optional, boiled)
- 2 green chilies (finely chopped)
- 1 inch ginger (grated)
- 1 teaspoon cumin seeds
- 1 teaspoon fennel seeds (optional)
- ½ teaspoon turmeric powder
- 1 teaspoon coriander powder
- 1 teaspoon garam masala
- ½ teaspoon red chili powder
- 1 teaspoon dry mango powder (amchur)
- Salt to taste
- 2 tablespoon oil
- Fresh coriander leaves (chopped, for garnish)
For frying
- Oil (enough for deep frying)
Instructions
1. Prepare the Dough
- In a large bowl, mix the flour and salt.
- Add oil or ghee and rub it into the flour with your fingers until the mixture resembles breadcrumbs.
- Gradually add water, a little at a time, to form a firm but pliable dough. It should not be too soft.
- Cover the dough with a damp cloth and let it rest for 30 minutes.
2. Make the Filling
- Heat 2 tbsp oil in a pan over medium heat. Add cumin seeds and fennel seeds, letting them splutter.
- Add grated ginger and chopped green chilies. Sauté for a minute.
- Add the boiled peas (if using) and sauté for 2 minutes.
- Add mashed potatoes and mix well.
- Now, add turmeric, coriander powder, garam masala, red chili powder, dry mango powder, and salt. Stir until the spices are well incorporated.
- Cook for 2-3 minutes, then remove from heat. Add fresh coriander leaves and let the filling cool.
3. Shape the Samosas
- Divide the dough into 10 equal-sized balls.
- Roll each ball into a thin oval or round shape (around 5-6 inches in diameter).
- Cut each rolled-out piece in half to form two semi-circles.
- Take one semi-circle and fold it into a cone shape, sealing the edge with water.
- Fill the cone with 1-2 tbsp of the potato filling.
- Seal the open end by pinching the edges together, ensuring there are no gaps.
4. Fry the Samosas
- Heat oil in a deep frying pan on medium heat.
- Carefully slide in the samosas and fry them in batches until they are golden brown and crispy on all sides.
- Remove the samosas with a slotted spoon and drain on a paper towel.
5. Serve
- Serve the samosas hot with tamarind chutney, green chutney, or ketchup.
Notes
- Always fry samosas on medium-low heat to allow them to cook evenly. If the oil is too hot, the outer layer will brown too quickly while the inside remains uncooked.
- Don’t overfill your samosas! Leave some space inside so the filling can expand without tearing the dough during frying.
- While the classic potato-pea filling is popular, feel free to experiment with different fillings like spiced lentils, paneer for variety.
Perfect Chutney Pairings for Your Samosas
No samosa experience is complete without the perfect chutney to complement its flavors. Here are a few chutney tips and variations to serve alongside your samosas that will take your snack game to the next level:
1. Classic Tamarind Chutney (Imli Chutney)
- Tip: Use seedless tamarind pulp for a smooth texture and add jaggery for a rich sweetness. Adjust the balance of tanginess and sweetness to your preference by tweaking the amount of tamarind and sugar.
- Flavor Boost: Add a pinch of roasted cumin powder and black salt to intensify the flavor.
- Serving: This chutney is perfect for balancing the savory spiciness of your samosas with its sweet and tangy profile.
2. Mint-Coriander Chutney (Hari Chutney)
- Tip: Keep the chutney vibrant green by blending the mint and coriander with a few ice cubes or chilled water. Add lemon juice for a zesty kick.
- Flavor Boost: For extra depth, throw in a few roasted peanuts or yogurt to thicken the chutney and make it creamy.
- Serving: This fresh and tangy chutney pairs beautifully with the crispy samosa shell, providing a refreshing contrast.
3. Garlic Chutney
- Tip: Roasting the garlic cloves lightly before blending gives a smoky flavor. Add red chilies for heat and a splash of vinegar for sharpness.
- Flavor Boost: A teaspoon of sugar balances the spicy and tangy flavors.
- Serving: If you love a strong, bold chutney, this garlic-based option adds a punch of flavor that pairs well with mild samosas.
4. Tomato Chutney
- Tip: Simmer fresh tomatoes with ginger, garlic, and spices like mustard seeds and curry leaves. Add a bit of sugar for sweetness and chilies for heat.
- Flavor Boost: A dash of tamarind pulp will add a lovely tang, making it an excellent option for those who enjoy sweet and sour notes.
- Serving: This chutney works well for those who prefer a thicker, tangier sauce alongside their samosas.
5. Sweet Mango Chutney
- Tip: Use ripe mangoes for a naturally sweet base and season with mustard seeds, red chili powder, and a bit of vinegar for tang.
- Flavor Boost: Add a dash of garam masala to enhance the chutney’s warmth and complexity.
- Serving: This is a great option for people who prefer a fruity, sweet complement to their savory samosas.
Chutney Pro Tip:
Prepare your chutneys ahead of time and store them in the fridge. Most chutneys, especially tamarind and garlic, taste better the next day as the flavors have time to meld. You can store chutneys in airtight containers for up to a week. These chutneys will not only enhance the flavor of your samosas but also offer a variety of taste experiences, making your snack spread versatile and exciting!
As we conclude our samosa-making journey, it’s clear that this beloved snack is more than just a simple dish—it’s a symbol of joy, tradition, and the love for good food. Whether you’re indulging in a classic potato-and-pea filling or experimenting with your own creative variations, mastering the art of making samosas at home is both satisfying and rewarding. The crispy, golden crust and the flavorful filling create a harmony of textures and tastes that is sure to impress at any occasion.
You can also try Poha, Aloo Paratha, Pav Bhaji also for your quick breakfast.
Remember, the secret to a perfect samosa lies in the details: the right balance of spices, a well-prepared dough, and that all-important frying technique. Follow this recipe, experiment with fillings, and don’t forget to pair your samosas with some tangy tamarind chutney or cooling mint raita to elevate the experience.
We hope this recipe brings you as much joy as it brings to countless others across the world. So the next time you’re craving something crispy, flavorful, and homemade, look no further than this timeless treat. Thank you for joining us on Recipe Rahasya—where every recipe holds a story. We can’t wait to see the samosas you create, so don’t forget to share with us!
Let me know how it turned out in the comments below!
Happy Cooking, Recipe Rahasya.
FAQs About Samosa Recipe
Can I bake the samosas instead of frying them?
Yes, you can bake samosas for a healthier option. Preheat your oven to 180°C (350°F), place the samosas on a baking tray, and lightly brush them with oil. Bake for 25-30 minutes or until golden brown, flipping them halfway through for even browning.
What type of flour is best for the samosa dough?
Traditionally, all-purpose flour (maida) is used for making the samosa dough. You can also try a combination of whole wheat flour and all-purpose flour for a healthier version, though the texture may differ slightly.
How do I prevent the samosa crust from turning soggy?
To avoid soggy samosas, ensure that the filling is dry and at room temperature before wrapping it in the dough. Also, fry the samosas on medium-low heat to achieve a crispy crust.
Can I freeze samosas for later use?
Yes, you can freeze uncooked samosas. Place them on a tray in a single layer and freeze until solid. Once frozen, store them in an airtight container or freezer bag. When ready to eat, fry them directly from the freezer—no need to thaw.
What chutney pairs best with samosas?
Samosas are traditionally served with tamarind chutney or green chutney made from cilantro and mint. Both complement the spicy flavors of the filling perfectly.
Can I use store-bought wrappers for making samosas?
Yes, store-bought spring roll or pastry sheets can be used for a quicker alternative. However, the texture will differ from the traditional samosa dough, which is thicker and crispier.
How long can I store leftover samosas?
Leftover samosas can be stored in the refrigerator for 2-3 days. Reheat them in an oven or air fryer to retain their crispiness before serving.
Can I change the filling of the samosas?
Absolutely! You can experiment with various fillings such as paneer, mixed vegetables, lentils, or even a sweet filling like khoya for a unique twist.
breakfast (4) Indian Breakfast (4) main dishes (3) Mumbai Street Snacks (1) Paneer (2) Pav Bhaji (1) quick breakfast (4) quick snacks (3) snacks (4) tasty snacks (4)